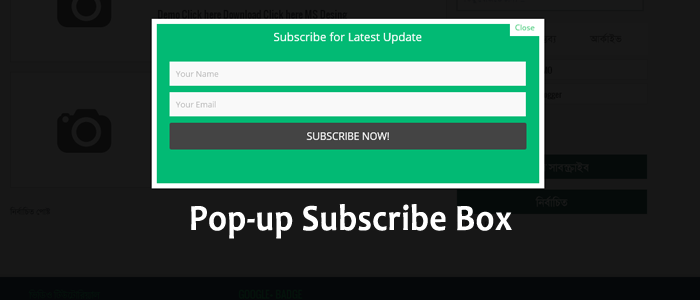
Email Subscribe box क्या है और क्यों जरुरी है आपके ब्लॉग में .
अगर आप अपने ब्लॉग में email subscribe बॉक्स का उसे करते है और कोई यूजर उसे subscribe करता है तो उसको अप्पने हर पोस्ट जो आप उसे subscribe करने के बाद publish करेंगे उसका email जायेगा इस तरह आप अपने हर उस visitor से जुरे रह सकते है अगर आप एक blog चलते है तो आपको इसका यूज़ जरुर करना चाहिय इससे अप्पके visitor आपसे जुरे रहेंगे और आपकी earning भी बढ़ेगी |
किस तरह से Email Subscribe box अपने ब्लॉग में लगा सकते है ?
email susbscribe बॉक्स लगाने के लिय आपको अपने ब्लॉग के HTML में कुछ कोड add करने होंगे
- इसके लिय आपको अपने blogger के theme section में जाय |
- फिर edit html पे क्लिक करें
अब अप्पको इस कोड </style> को search करें
निचे दिय गये कोड को अप्पने ब्लॉग में add करें |
#sub-box {display:none;background:rgba(0,0,0,0.9);width:100%;height:100%;position:fixed;top:0;left:0;z-index:99999;}
#boxclose {width:100%;height:100%;-webkit-transform:translateZ(0);}
#boxview {background:#fff;border:8px solid #fff;width:600px;height:250px;position:absolute;top:33%;left:28%;}
#closebox {float:right;cursor:pointer;position:absolute;right:-1px;top:-2px;}
#closebox:before {content:"Close";padding:5px 8px;background:#fff;color:#48cb7a;font-weight:normal;font-size:12px;font-family:Open sans;}
#boxlink,#boxlink a.visited,#boxlink a,#boxlink a:hover {color:#aaaaaa;font-size:9px;text-decoration:none;text-align:center;padding:5px;}
#subscribe-box {width:600px;height:250px;background-color:#02BA74;}
#subscribe-box p {font-family:'Open Sans';font-size:18px;color:#fff;line-height:20px;padding:10px 20px 0 20px;margin:0;}
#subscribe-box .emailfield {padding:0px 20px 10px;}
#subscribe-box .emailfield input {background:#f9f9f9;color:#bbb;padding:10px;margin-top:10px;font-size:13px;font-family:'Open Sans';width:96.3%;border:0;transition:all 0.4s ease-in-out;}
#subscribe-box .emailfield input:focus {background:#fff;outline:none;color:#888;}
#subscribe-box .emailfield .submitbutton {background:#444;color:#fff;text-transform:uppercase;font-weight:normal;font-size: 16px;border:none;outline:none;width:100%;cursor:pointer;border-radius:3px;transition:all 0.4s ease-in-out;}
#subscribe-box .emailfield .submitbutton:active {outline:none;border:none;background:#fff;color:#e25734;}
#subscribe-box .emailfield .submitbutton:hover{background:#fff;color:#444;}
अब आपको save template पे क्लिक करें
अब आपको Layout > Add a gadget > HTML/Javascript में जाकर निचे दिय गये कोड को पेस्ट करे
<script type='text/javascript'> //<![CDATA[ jQuery.cookie = function (key, value, options) { // Pengaturan cookie if (arguments.length > 1 && String(value) !== "[object Object]") { options = jQuery.extend({}, options); if (value === null || value === undefined) { options.expires = -1; } if (typeof options.expires === 'number') { var days = options.expires, t = options.expires = new Date(); t.setDate(t.getDate() + days); } value = String(value); return (document.cookie = [ encodeURIComponent(key), '=', options.raw ? value : encodeURIComponent(value), options.expires ? '; expires=' + options.expires.toUTCString() : '', // use expires attribute, max-age is not supported by IE options.path ? '; path=' + options.path : '', options.domain ? '; domain=' + options.domain : '', options.secure ? '; secure' : '' ].join('')); } // cookie options = value || {}; var result, decode = options.raw ? function (s) { return s; } : decodeURIComponent; return (result = new RegExp('(?:^|; )' + encodeURIComponent(key) + '=([^;]*)').exec(document.cookie)) ? decode(result[1]) : null; }; //]]> </script> <script type='text/javascript'> jQuery(document).ready(function($){ if($.cookie('popup_facebook_box') != 'yes'){ $('#sub-box').delay(3000).fadeIn('fast'); $('#closebox, #boxclose').click(function(){ $('#sub-box').stop().fadeOut('fast'); }); } }); </script> <div id='sub-box'> <div id='boxclose'> </div> <div id='boxview'> <div id='closebox'> </div> <div id='subscribe-box'> <center><p>Subscribe for Latest Update</p></center> <div class='emailfield'> <form action='http://feedburner.google.com/fb/a/mailverify?uri=YOUR-USER-NAME' method='post' onsubmit='window.open('http://feedburner.google.com/fb/a/mailverify?uri=YOUR-USER-NAME, 'popupwindow', 'scrollbars=yes,width=550,height=520');return true' target='popupwindow'> <input type='text' name='name' onblur='if (this.value == "") {this.value = "Your Name";}' onfocus='if (this.value == "Your Name") {this.value = "";}' value='Your Name'/> <input type='text' name='email' onblur='if (this.value == "") {this.value = "Your Email";}' onfocus='if (this.value == "Your Email") {this.value = "";}' value='Your Email'/> <input name='uri' type='hidden' value='YOUR-USER-NAME'/> <input name='loc' type='hidden' value='en_US'/> <input class='submitbutton' type='submit' value='Subscribe Now!'/> </form> </div></div> </div> </div>
अब आपको YOUR-USER-NAME को अपने feedburner id से Replace करें .
कैसे पता करे अपना feedburner id /Generate करें
feedburner id Generate करने के लीय आपको Layout > Add a gadget > Follow by Email
को add करे यह आपको एक लिंक मिलेगा http://feeds.feedburner.com/blogspot/xxx के जगह पे जो लिंक है वही आपका feedburner id है |
Comments
Post a Comment